
This walkthrough creates a paid membership that unlocks a members-only page. You can change every setting later.
Step 1 – Create the plan #
- Go to FW Memberships → Memberships → Membership Plans and click Add New Plan.
- Enter a Plan name, for example “Gold”, and set Status to Active.
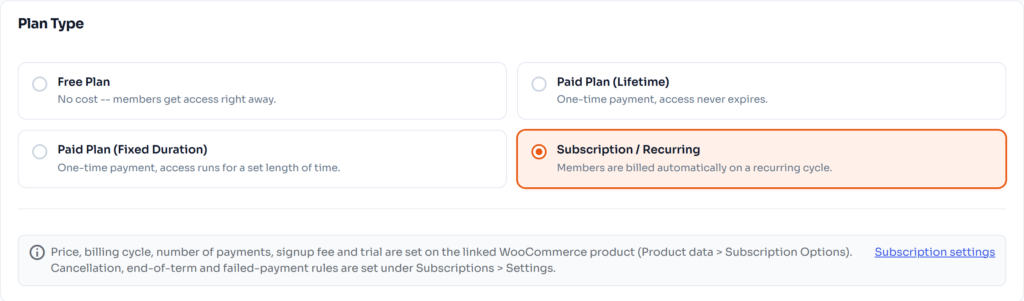
- Pick a plan type. For a recurring plan choose Subscription / Recurring; for a one-off payment choose Paid Plan (Fixed Duration).
Step 2 – Link a product #
Turn on Allow access to this plan after purchasing a specific product and choose a product, or click Create Product to make one with the plan’s price. Customers who buy that product become members.
Step 3 – Choose what the plan unlocks #
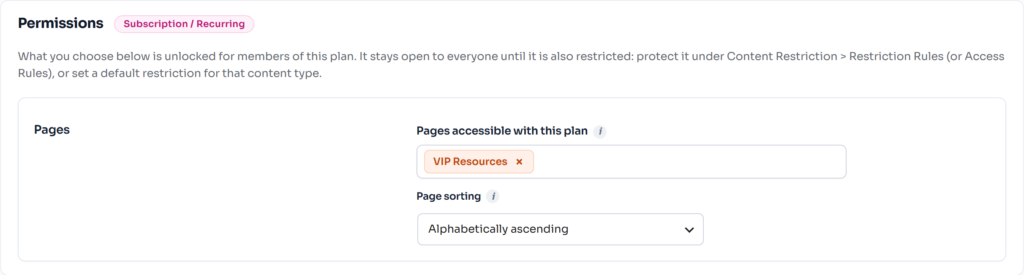
In the plan’s content section, pick the Pages accessible with this plan – for example your “Members area” page. You can also unlock posts, post categories, products and product categories.
Click Save plan.
Step 4 – Decide what visitors see #
Go to FW Memberships → Content Restriction → Restriction Rules and choose what non-members see when they open protected content: a redirect, a paywall with a teaser, or alternative content.
Step 5 – Test it #
- Open the protected page in a private browser window – you should see the restriction.
- Buy the linked product with a test payment (use your gateway’s test or sandbox mode).
- After the order is paid, open the page again as that customer – the content is now visible, and the membership shows under My Account → Memberships.
💡 Tip: Administrators always see everything. Test as a customer, not while logged in as an admin.